
 US
 Australia
 United Kingdom
 Europe

Decals for 0
IMPROVE GRIP, HANDLING & PERFORMANCE.
A decal pack is the cheapest thing in the merchandise range and the one most likely to be ruined in the first thirty seconds. Almost all of that comes down to surface preparation and a technique nobody explains. Decal vs Sticker The terms get used interchangeably and there is a real difference. A sticker is printed on paper or vinyl with a backi... Read more
A decal pack is the cheapest thing in the merchandise range and the one most likely to be ruined in the first thirty seconds.
Almost all of that comes down to surface preparation and a technique nobody explains.
Decal vs Sticker
The terms get used interchangeably and there is a real difference.
A sticker is printed on paper or vinyl with a backing, peeled off and pressed down as a single piece. The whole thing goes on, including the background around the design.
A decal is cut from a sheet of vinyl instead. The shape itself is cut from a sheet, the surrounding material is removed, and what transfers to the surface is the design alone with no background.
That is why a decal on glass or paint looks like it was painted on rather than stuck on, and why it holds up outdoors where a paper sticker would not.
Die cut decals arrive on a backing sheet with transfer tape over the top, which holds the design together until it is on the surface. Remove the backing, apply the tape and design together, then peel the tape away leaving the vinyl behind.
Vinyl Types and Why They Last Differently
Not all vinyl is the same, and the difference shows over years rather than weeks.
Calendered vinyl is rolled into sheets, which leaves internal stress in the material. It is cheaper, it works well on flat surfaces, and over time it can shrink slightly as that stress releases.
Cast vinyl is made by pouring liquid vinyl into a sheet, which leaves it stress free. It is thinner, more conformable over curves, and considerably more stable outdoors. It also costs more to produce and to buy.
For a flat window or a toolbox lid either works. For a curved panel or anything expected to last several years in sun, cast is what holds up.
UV stability is the other variable to weigh. Quality vinyl holds its color for years outdoors while cheap material fades and goes brittle, and brittle vinyl cracks rather than peeling cleanly when you come to remove it.
How to Apply Decals Without Bubbles
Preparation is most of the job here and the part most often skipped.
Clean the surface with isopropyl alcohol rather than a household or automotive cleaner. Wax, polish and silicone residue all stop the adhesive bonding, and most car cleaners leave some behind by design.
Work somewhere between about 50 and 90 degrees. Cold weather stops the adhesive from grabbing properly. A hot panel in direct sun makes the vinyl stretch and the adhesive grab before the decal is positioned.
Use the hinge method for anything larger than a few inches. Position the decal with the backing still on, tape a hinge along one edge, then fold it back, peel the backing from that half and squeegee down from the hinge outward. Repeat the same process across the other half.
Squeegee from the center toward the edges so air is pushed out rather than trapped. A plastic card wrapped in a cloth works if you do not have a proper tool.
Leave the transfer tape on for a few minutes before peeling it back slowly at a sharp angle rather than pulling it straight up.
Wet Application for Larger Decals
A technique worth knowing for anything big enough to be difficult.
Mix a few drops of dish soap into a spray bottle of water and mist the surface before applying. The soap stops the adhesive grabbing immediately, which means the decal can be slid into position rather than committed in one go.
Squeegee the water out from the center, working outward, then leave it considerably longer before touching it. The adhesive needs the moisture to evaporate before it reaches full strength, usually a day or more.
The trade is that wet application is less forgiving in cold weather and takes longer to cure. For small decals it is unnecessary, and dry application is both quicker and stronger sooner.
Car Window Decals and Other Surfaces
Glass is the easiest surface to work with and the most forgiving.
Car window decals and vinyl window decals describe the same thing, and glass is why they work so well. It is flat, it is hard, and a decal on a side window or rear quarter sits flush. Removal years later is also simplest, since glass tolerates heat and solvents that paint does not.
Check your local rules before applying to a windshield or front side glass, since window tint and obstruction regulations vary by state and a decal in the wrong place can fail an inspection.
Painted panels work well on modern clear coat. The one caveat is that a decal protects the clear beneath it from UV, so removing one after several years can leave a faint outline where the surrounding paint has faded.
Textured plastic is the one surface to avoid. Bumper trim, grained interior panels and textured fender flares do not give the adhesive a flat surface and the decal lifts at the edges within weeks.
Powder coated metal, helmets, laptops and water bottles all work provided the finish is hard and smooth rather than soft touch.
How to Remove Decals From a Car
The approach depends on how long it has been there, and patience beats force in every case.
Begin with heat before you try anything else. A hair dryer or a heat gun on low softens the adhesive and makes the vinyl pliable. Work a small area at a time rather than heating the whole decal at once.
Lift an edge with a fingernail or a plastic tool rather than anything metal. Once a corner is free, pull at a shallow angle back across itself rather than straight out, keeping the heat moving ahead of where you are pulling.
Old vinyl that has gone brittle will come off in fragments rather than as a piece. That is normal on anything more than a few years old and simply means more passes.
Adhesive residue comes off with a dedicated adhesive remover or isopropyl alcohol. Test any solvent on a hidden area first, since some strip wax and a few can affect older or repainted finishes.
Finish with a wash and a coat of wax or sealant on the area, which evens out the appearance where the decal was protecting the paint.
Never take a metal blade to any paintwork. On glass a plastic razor is acceptable with care, and a metal one is how people put scratches in windows.
Caring for Decals Once They Are On
A decal needs almost nothing, and the small amount it does need is worth knowing.
Leave the decal alone for the first day. The adhesive reaches full strength over roughly 24 to 72 hours, and washing before then can lift an edge that would otherwise have held for years.
Avoid pressure washing close to the edges, particularly at a shallow angle. A pressure washer finds any edge that is not fully bonded and gets underneath it.
Hand washing is kinder than an automatic car wash, where brushes catch edges and the detergents are harsher than anything you would use at home.
Wax and sealant go over a decal without harming it on most products, though abrasive polish and compound will dull or cut through the vinyl surface.
Check the decal edges every so often for lifting. A corner that has started lifting can usually be pressed back down with heat and firm pressure if caught early, and becomes a removal job if it is not.
Where to Put Ten of Them
A pack of ten is more than a car needs, which is deliberate.
The vehicle takes one or two at most. Restraint reads better than coverage, and a single well placed decal says more than six scattered across a panel.
A toolbox is where the rest usually end up, and a workshop cabinet or a creeper is fair game too.
A helmet, a laptop lid, a water bottle or a cooler all work provided the surface is hard and smooth.
Having spares matters more than most people expect. Having a couple in reserve means a decal that gets damaged, or a panel that gets replaced, is not the end of it.
Getting the Placement Right
A well applied decal in a bad position still looks wrong.
Measure the position properly rather than eyeballing it. Mark the position with low tack masking tape and stand well back before committing, since what looks centered from two feet rarely does from across a parking lot.
Line up against a panel line or a window edge rather than against the ground, because very little on a car is actually level.
Think about what the decal sits next to. Spacing and consistency matter more than size, and a cluttered panel reads as noise rather than as anything deliberate.
Ten decals in a pack is enough to experiment with placement on a toolbox before putting one on the car.
Shop Whiteline Decals for Your
Browse the decal packs available in yellow, black, silver and white, supplied in packs of ten so there is enough for a car, a toolbox and a helmet without rationing them. The full merchandise range includes limited edition tees, mechanic gloves, the logo beanie and accessories.
5 items
-
Whiteline Decal Kits
✅ Fits 0In StockShips within 24hrs.Ships within 24hrs.SKU: KWM001Whiteline Decal Kits
✅ Fits 0Boosts handling and performance, while optimising suspension geometry; the perfect, complete upgrade. Includes: 1 Decal PackIn StockShips within 24hrs.Ships within 24hrs.Qty Required 1Kit Contents 1 Decal Pack$21.49Select Option To Show Price -
Whiteline Decal Kits
✅ Fits 0In StockShips within 24hrs.Ships within 24hrs.SKU: KWM002Whiteline Decal Kits
✅ Fits 0Balances comfort with performance while minimising noise and vibrations; the perfect, complete upgrade. Includes: 1 Decal PackIn StockShips within 24hrs.Ships within 24hrs.Qty Required 1Kit Contents 1 Decal Pack$21.49Select Option To Show Price -
Whiteline Decal Kits
✅ Fits 0In StockShips within 24hrs.Ships within 24hrs.SKU: KWM003Whiteline Decal Kits
✅ Fits 0Boosts your car's look; the perfect, complete upgrade. Includes: 1 Decal PackIn StockShips within 24hrs.Ships within 24hrs.Qty Required 1Kit Contents 1 Decal Pack$21.49Select Option To Show Price -
Whiteline Decal Pack - White
✅ Fits 0In StockShips within 24hrs.Ships within 24hrs.SKU: KWM004Whiteline Decal Pack - White
✅ Fits 0Balances comfort with performance while minimising noise and vibrations; the perfect, complete upgrade. Includes: 1 Decal PackIn StockShips within 24hrs.Ships within 24hrs.Qty Required 1Kit Contents 1 Decal Pack$21.49 -
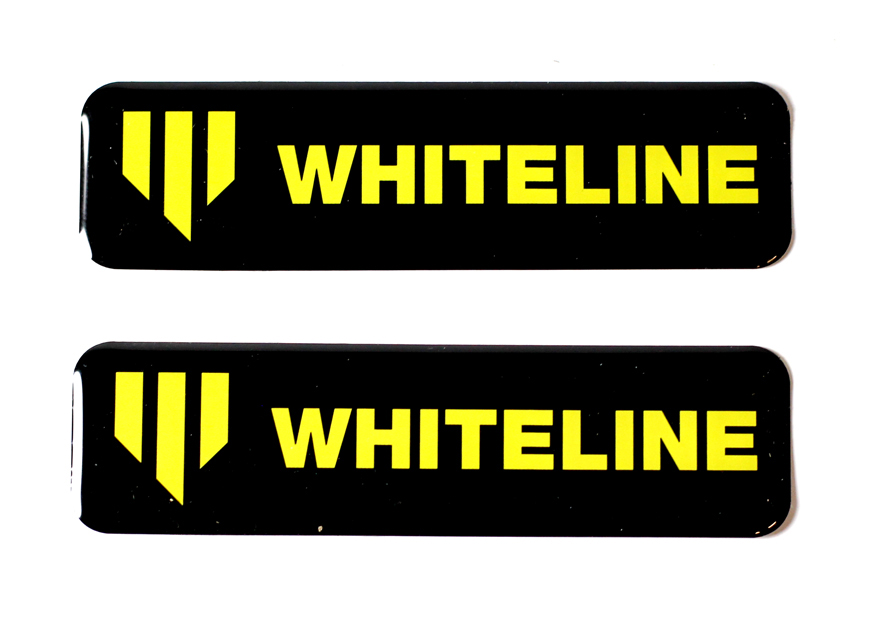
Whiteline Gel Vehicle Badge
✅ Fits 0 In StockShips within 24hrs.Ships within 24hrs.SKU: KWM046Whiteline Gel Vehicle Badge
✅ Fits 0In StockShips within 24hrs.Ships within 24hrs.Qty Required 1Kit Contents 2 Gel Badges$8.89
Your vehicle
Matching vehicles
No match — try selecting it below.
Refine your search
Clear all- Performance Suspension Kits 22
- Lowering Springs 36
- Sway Bar & Sway Bar Kits 462
- Sway Bar Bracket 7
- Sway Bar Lateral Lock 10
- Sway Bar Support Brace 3
- Sway Bar Link 104
- Leveling Kits 2
- Lift Kits 18
- Diff Drop Kit 2
- Strut Brace 23
- Bushings 1050
- Alignment Pins and Bushings 18
- Anti Roll Bar Mount 1
- Axle Bushings 5
- Body Mount Bushings 45
- C-Bushings 2
- Coil Spring Insulators 3
- Coil Spring Spacers 20
- Control Arm Bushings 386
- Differential Bushings 50
- Door Jamb Bushing 1
- Lateral Arm Bushings 6
- Leaf Spring Bushings 15
- Leaf Spring Pads 1
- Leaf Spring Shackle Bushing 31
- Master Bushing Kits 39
- Radiator Bushings 2
- Radius Arm Bushings 14
- Shock Bushings 28
- Steering Bushings 41
- Steering Column Bushing 1
- Strut Mount Bushing 4
- Strut Rod Bushing 6
- Subframe Bushing 29
- Sway Bar Bushings 213
- Sway Bar Link Bushings 25
- Toe Link Bushing 1
- Torsion Bar Bushing 1
- Track Bar Bushings 12
- Trailing Arm Bushing 48
- Transfer Case Bushings 1
- Watts Link Bushing Kit 1
- Control Arms 160
- Ball Joint 32
- Control Arm Brace 1
- Control Arm Kit 125
- Control Arm Assembly with Ball Joint 2
- Control Arm Kit - Lower 56
- Control Arm Kit - Upper 47
- Control Arm Relocation Brackets 1
- Radius Arm 1
- Alignment Parts 31
- Camber Bolts 8
- Caster Camber Plates 23
- Transmission Parts 22
- Shifter Bushing 3
- Transmission Mount 19
- Strut Mount 3
- Strut Mount 3
- Tie Rods 9
- Roll Center Kits 8
- Tie Rod Ends 1
- Track Bar 8
- Support Brace 1
- Engine Bushings 33
- Engine Mount Bushings 33
- Car Accessories 1
- Headlight Sensor Bracket 1
- Universal Auto Parts 49
- Bushing Grease 1
- Dust Covers 3
- Spare Tire Carrier Mount 1
- Strut Mount 1
- Universal Bump Stops 19
- Valve Stem Caps 1
- Nuts, Bolts & Screws 5
- Control Arm Bolt Kit 3
- Control Arm Washer 1
- Sway Bar Link Washer 1
- Merchandise 11
- Beanie 1
- Decals 5
- Gloves 1
- Key Chain 1
- T-Shirts 3
- Workshop Tools 2
- Bushing Press Kit 1
- Wheel Alignment Tool 1
No categories match.
Can’t find what you’re looking for?
Our team can help you find the right part — or tell us what was missing so we can improve the site.
Call Us +1 909-476-2860 Give Feedback (opens in a new tab)


